I wanted to create and manage users for local use in the project and set up an LDAP server.
Since this was my first time touching LDAP, I wrote down a rough explanation of LDAP, its usage, and the procedure for installing LDAP on Ubuntu 18.
We used OpenLDAP for LDAP, installed and configured LDAP so that phpLDAPadmin would work, and even changed the domain name to our own.
First of all, a brief explanation of LDAP.
What is LDAP?
LDAP is a database for data such as users, PCs, email addresses, addresses, etc.
Such data is mainly used for reference purposes, and data is registered by being classified and subdivided at an arbitrary depth from major categories, such as "company name->department name->division name" or "country->prefecture->city, town, or village" to medium and small categories, so unlike ordinary databases, it has the following characteristics. Unlike regular databases, it has the following characteristics.
- Specialized in searching and retrieving data at high speed (conversely, not suitable for frequent data registration and updating)
- Data is registered in a tree format, not a table format.
glossary
entry
The data can be easily understood by imagining it as a tree of PC directories and files.
Each piece of data is called an entry, and multiple attributes are registered as data in an entry.
There is no directory/file-like distinction, and an entry can have child entries within it. In other words, a classified entry, like a directory, is also an entry.
Example
For the following user "cn=user-01

- There is a classification entry "ou=users" in the root "dc=test,dc=internal" and a user entry "cn=user-01" in it.
- The user entry "cn=user-01" has the attributes "createtimestamp", "creatorsName"....
Also, as mentioned above, entries can have child entries, so entries can be added and classified at any position.
In addition to entries for classification, user entries such as those listed above can also have child entries.
In this way, we create a database of entry trees by nesting entries.
dn
The absolute path of the entry is called the dn (Distinguish Name).
The dn is written in the same way as an Internet URL, beginning with the parent at the top and comma-separated from right to left.
In the case of "cn=user-01" mentioned above, dn becomes "cn=user-01,ou=users,dc=test,dc=internal".
ObjectClass (schema)
As mentioned earlier, entries can register data as attributes, but the names and formats of the attributes that can be used should be registered in advance.
You can also register a set of attributes as an ObjectClass. The term "schema" also appears, but it is the same as "ObjectClass.
An ObjectClass can be set when adding an entry, indicating what kind of object the entry is and preventing the omission of attributes when adding an entry. Entries can have multiple ObjectClasses.
Attributes and ObjectClasses can be defined and registered by the user on their own, but in most cases, the LDAP server is configured to load a generic template, so the template is used.
rdn
The leftmost of the dn will be the entry's own name, which is called the rdn (Relative Distinguished Name).
The rdn is determined by the attributes an entry has, and which attributes are rdn is defined in the ObjectClass.
For example, the aforementioned user "cn=user-01,ou=users,dc=test,dc=internal" uses the attribute "cn=user-01" for rdn.
Frequently Used Attributes
dc (Domain Component)" is often used for domain classification names, "o (Organization)" for organizational classification names, "ou (Organization Unit)" for department classification names, and "cn (Common Name)" for user classification names.
However, they are only defined in the ObjectClass template loaded by default and have no special meaning in the LDAP specification.
LDAP Settings
config
LDAP settings are also registered with LDAP as the LDAP database. Then, when the registered values are changed, the LDAP settings are reflected in real time.
LDAP configuration data is registered in a database with dn "cn=config".
In other words, LDAP consists of a database "config" to register LDAP settings and a database to register actual data.
In this case, only one database was created to register data, but it is possible to create multiple databases with a single LDAP.
slapd.conf
The LDAP configuration file is "/usr/share/slapd/slapd.conf", but when installed with the Ubuntu18 package, "slapd.conf" is not used and the "config" database is built directly.
So, after LDAP installation, you can directly edit the config entry to configure the settings.
There is also an initial setup command to register entries in the "config" database from "slapd.conf", but we did not use it this time.
It is more correct to say that "slapd.conf" is a template for config rather than a configuration file.
Steps to install LDAP on Ubuntu18
OpenLDAP Installation
The OpenLDAP service is "slapd", install slapd and LDAP utilities.
sudo apt-get install slapd
sudo apt-get install ldap-utils
After installation is complete, the service is started.
Service Confirmation
systemctl status slapd
Automatic service startup
sudo systemctl enable slapd
phpLDAPadmin installation
There is a phpLDAPadmin in the Ubuntu package, so it would have been easiest if I could have installed that, but since php7.2 or later gives an error, I used a fork of phpLDAPadmin based on the following article.
php related installation
To run phpLDAPadmin, the php extension packages "php-ldap" and "php-xml" must be installed.
sudo apt-get install php-ldap
sudo apt-get install php-xml
Web server installation
Install a web server so that php can run.
How to do this is omitted here. By the way, if you install phpLDAPadmin with the Ubuntu package, Apache2 will be installed as the web server.
phpLDAPadmin installation
Bring the forked version of phpLDAPadmin for php7.2 or later from GitHub and extract it to the web directory.
phpLDAPadmin Configuration
Copy "config/config.php.example" in phpLDAPadmin to "config/config.php" to create a configuration file.
The contents of the configuration file can be left unchanged.
phpLDAPadmin access
Open the following URL
「http://localhost/phpLDAPadmin-master/index.php%E3%80%8D
Then the front page of phpLDAPadmin will be launched.
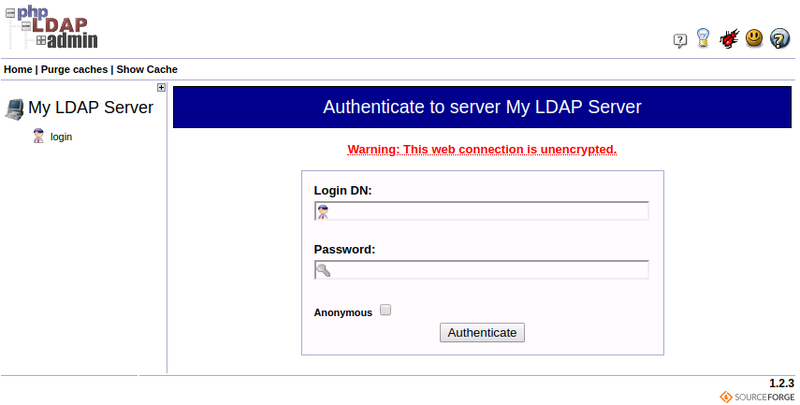
phpLDAPadmin login
When LDAP is installed with the Ubuntu package, an administrator user (rootDN) is created as appropriate.
To login to phpLDAPadmin, I need the dn of its admin user, but I don't know the dn because it was created properly during installation.
So, use the search command to display the contents of config and from there check the dn of the admin user.
sudo ldapsearch -LLL -Y EXTERNAL -H ldapi:/// -b cn=config
...
olcRootDN: cn=admin,dc=xxxx,dc=xxxx,dc=xxxx
...
Enter the above "olcRootDN" into the phpLDAPadmin login screen to log in. The password is the one you set when you installed LDAP.
Now that LDAP and phpLDAPadmin are installed, you can use phpLDAMadmin to edit LDAP entries.
The rest of the work would be done using phpLDAPadmin, In this case, I wanted to change the domain name (suffix), so I had to edit config.
Because config editing could not be done with phpLDAPadmin and required the use of LDAP commands, a brief description of the LDAP commands and the procedure for changing the suffixes are provided.
LDAP Commands
Entry Search
sudo ldapsearch -LLL -Y EXTERANL -H ldapi:/// -b <bn> [検索条件]
LLL
- Specifies the format in which the results are displayed. LLL" is the simplest output.
Y EXTERNAL
- Normally, the user using the command is the user registered in LDAP, but "-Y EXTERANAL" would be the Linux user executing the command.
- In the above case, the Linxu user is "root" because it is executed with "sudo".
- The root user does not always have access, and which Linxu user is given which access privileges is set in "olcAccess" in "config".
- For example, "olcAccess: {0}to * by dn.extract=gidNumber=0+uidNumber=0,cn=peercred,cn=external" and so on, but the gid and uid are 0, that is, the root user access authority is set The gid and uid are 0, i.e., the access privileges are set to the root user.
H
- Specify the LDAP host. H ldapi:///" will allow direct socket access on the same server.
b
- Specifies the root dn to be searched.
- For example, "-b cn=config" to see the value of the configuration config.
- For example, to make the root dn of the phpLDAPadmin tree you just logged in, "-b dc=xxxx,dc=xxxx,dc=xxxx" will show all entries under the root dn.
search criteria
- Can be omitted.
- You can search by attribute value, such as "'(cn=user-0*)'".
Add Entry
sudo ldapadd -Y EXTERANL -H ldapi:/// -f <ldif_file>
Describe the entries to be added in the ldif file.
ldif
dn: <dn>
<属性名>: <属性値>
<属性名>: <属性値>
…
Delete Entry
sudo ldapdelete -Y EXTERANL -H ldapi:/// <dn>
sudo ldapdelete -Y EXTERANL -H ldapi:/// -f <ldif_file>
dn directly, or put the dn to be deleted in the ldif file.
ldif
dn: <dn>
Edit Entry Attributes
sudo ldapmodify -Y EXTERANL -H ldapi:/// -f <ldif_file>
Describe the attributes to be edited in the ldif file.
To edit multiple attributes, separate them with a "-".
ldif
# 属性追加
dn: <dn>
changetype: modify
add: <属性名>
<属性名>: <属性値>

-
# 属性削除
dn: <dn>
changetype: modify
delete: <属性名>

-
# 属性値変更
dn: <dn>
changetype: modify
replace: <属性名>
<属性名>: <属性値>
suffix change
The root dn of the tree of databases is called suffix, but it is set appropriately when installed with the Ubuntu package.
We wanted to use an arbitrary name, so we changed it using the following procedure.
Change suffix and grant access to Linux root user in suffix
sudo ldapmodify -Y EXTERANL -H ldapi:/// -f <ldif_file>
ldif
# suffix変更
dn: olcDatabase={1}mdb,cn=config
changetype: modify
replace: olcSuffix
olcSuffix: dc=xxx,dc=yyy

-
# 管理者ユーザー(rootDN)のdn変更
dn: olcDatabase={1}mdb,cn=config
changetype: modify
replace: olcRootDN
olcRootDN: cn=admin,dc=xxx,dc=yyy

-
# データベースのアクセス権を一旦削除
dn: olcDatabase={1}mdb,cn=config
changetype: modify
delete: olcAccess

-
# データベースのアクセス権追加
# Linuxのrootユーザーに全権限付与
dn: olcDatabase={1}mdb,cn=config
changetype: modify
add: olcAccess
olcAccess: to * by dn.exact=gidNumber=0+uidNumber=0,cn=peercred,cn=external,cn=auth manage by * break

-
# デフォルトのデータベースのアクセス権をコピー
dn: olcDatabase={1}mdb,cn=config
changetype: modify
add: olcAccess
olcAccess: to attrs=userPassword by self write by anonymous auth by * none

-
# デフォルトのデータベースのアクセス権をコピー
dn: olcDatabase={1}mdb,cn=config
changetype: modify
add: olcAccess
olcAccess: to attrs=shadowLastChange by self write by * read

-
# デフォルトのデータベースのアクセス権をコピー
dn: olcDatabase={1}mdb,cn=config
changetype: modify
add: olcAccess
olcAccess: to * by * read
We wanted to add entries to the database via LDAP commands, so we granted the Linux root user administrative privileges to the database.
suffix addition
It is not enough to just change the config suffix, you must add an entry that will be the root of the database (the dn entry in the suffix).
sudo ldapadd -Y EXTERANL -H ldapi:/// -f <ldif_file>
ldif
dn: dc=xxx,dc=yyy
objectClass: top
objectClass: dcObject
objectClass: organization
dc: xxx
o: xxx.yyy
This will change the suffix and add the rudo dn entry that the suffix points to, and the suffix will be available.
When you log in to phpLDAPadmin with rootDN "cn=admin,dc=xxx,dc=yyyyx", You will be able to access the database with the new suffix "dc=xxx,dc=yyyy".
config memo
The LDAP configuration is done by directly editing the values in the config database, but at first I had no idea what was going on when I first looked at the config in ldapsearch.
Config settings can also be made from "slapd.conf", so even if you do not use "slapd.conf", I think it will be easier to grasp the meaning of config if you take a quick look at "slapd.conf" first.
Below are bullet points for a rough description of config settings.
About "{}"
- When multiple identical attributes are set for a single entry, the attribute value is prefixed with the letters "{\
}". - Numbers begin with 0 in the order of registration and are used to distinguish attributes.
- When specifying attribute values, include "{\
}". Since "{\ }" is automatically added at the time of attribute registration, "{\ }" is not added to attribute values when registering attributes.
- When multiple identical attributes are set for a single entry, the attribute value is prefixed with the letters "{\
Types of databases
- The database type can be bdb, mdb, etc. and is called backend.
- Previously, bdb was the default, but recently mdb has become the default.
About ObjectClass and Attributes
- ObjectClass and attributes are not originally registered in LDAP, such as "dn: cn=schema,cn=config".
- As you can see from "include" in "slapd.conf", it is created from the default template "/etc/ldap/schema/*.schema".
- dn: olcDatabase={1}mdb,cn=config" points to the database normally used.
Access privileges to config and databases are set in "ocAccess".
- to \
by \ \ [by \ \ ]..." Set for each target attribute with
- to \
Feelings, etc.
When I first saw it, I thought it had a great meaning, like "cn-dc-oou". At first glance it looked difficult, but I was relieved to see that it was just a conventionally given name.
The tree also seemed difficult at first because it was unclear under what conditions it could be nested, but it turned out to be "nestable anywhere, no rules.
On the other hand, I thought attributes and ObjectClass would be simple, like data types and classes in programming languages, but they are quite complex. There are various templates available, so it would be easier to use the ones that are available.
I thought it would be easier to understand if I set up phpLDAPadmin and touched various things before accessing the information.